

Azure Basics – Creating a File Share
Do you want to have some file shares stored in Azure in a Serverless mode? this is your post then, just follow the directions and will be done within minutes.
The first thing you need is a Storage Account, which can be created following this post.
When the storage account is OK and ready to serve content, we are go to create a new file share, which will be accesible and mountable transparently in the main Operative Systems like (obviously) Windows, Linux and MacOS.
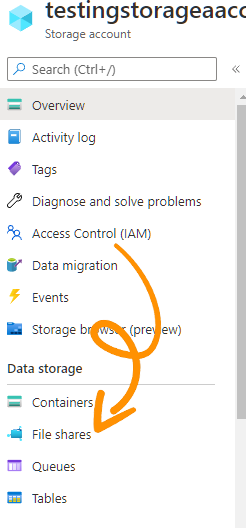
Let’s go! go to the Storage Account and search for File Share, like this.
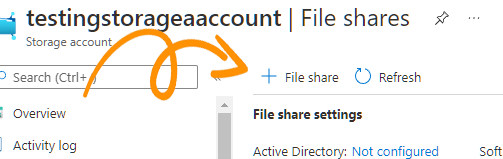
Now hit the +File Share, just like the image shows.
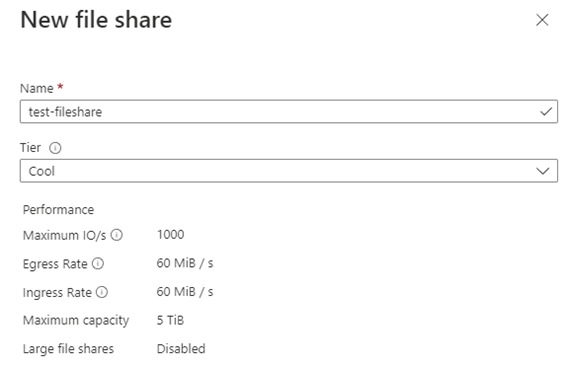
Now type the name of the file share and choose the tier of the storage, as this is a test, I chose the Cool tier to save some money.
When done creating the File Share, enter the unit and check the Connect button.

This will show the script to mount the unit in our favourite OS, just choose between Windows, Linux or macOS.
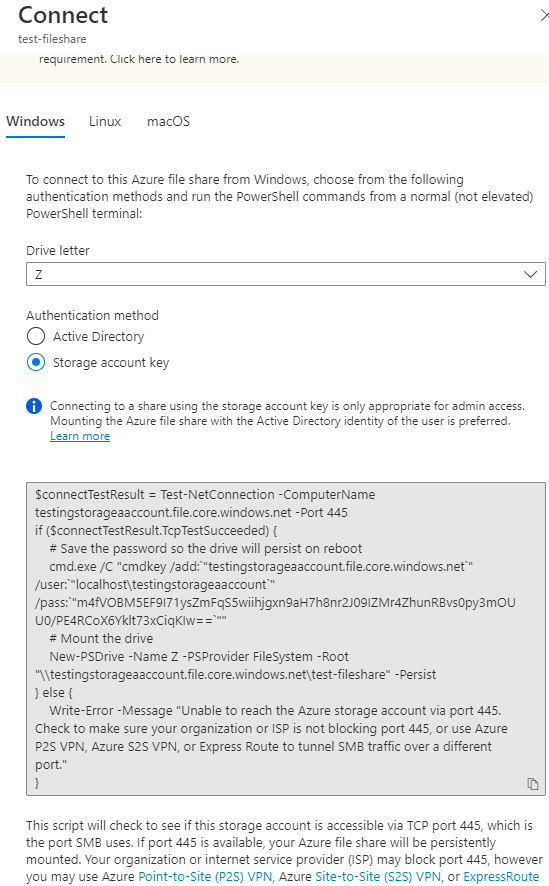
In this case, I will mount the unit in a Windows PC, so I just have to copy the script in a PowerShell sesssion, when the execution ends it will show something like this.
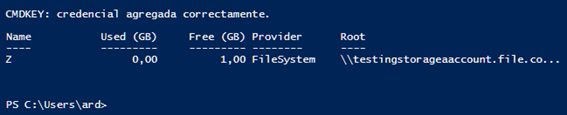
And The unit will be shown in the Windows Explorer aside of the other network units, and it’s ready to drop files inside.

If the unit is working properly, (there are no reasons not to), the files copied to the unit will be shown in the unit if we browse the content in the Azure portal web interface, like this.
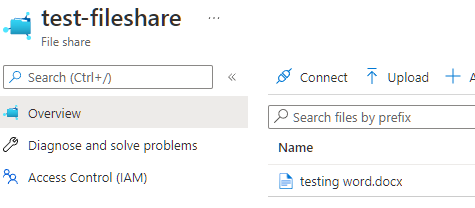
Easy as this! the Azure File Share is created and operative, ready to be used by the users!
Doing It From the CLI Instead
If you don’t want to click through the portal every time (I don’t, after the third file share), the Azure CLI does the same job in three commands:
az storage share create
  --name myfileshare
  --account-name mystorageaccount
  --quota 100

az storage share list --account-name mystorageaccount --output table
The --quota flag sets the maximum size in GiB. Unlike Blob Storage, a File Share has a hard provisioned quota, and you’re billed for the provisioned size on the Premium tier regardless of how much data you actually store there — that caught me out the first time, so double-check whether your storage account is Standard (pay for what you use) or Premium (pay for what you provisioned) before setting this.
Common Errors When Mounting
- “Error 53” or “Error 1326” on Windows: almost always means port 445 (SMB) is blocked. Many ISPs and corporate networks block outbound 445 by default. Run
Test-NetConnection -ComputerName mystorageaccount.file.core.windows.net -Port 445in PowerShell before assuming the storage account is misconfigured. - “Mount error(13): Permission denied” on Linux: usually the storage account key was pasted with a trailing newline or space when copied from the portal. Re-copy it into the credentials file and re-run
mount. - Connection works from the Azure Cloud Shell but not from home: this is the 445 issue again, but from the other direction — some home routers with strict outbound filtering block it too. If port 445 is a dead end, mount over the REST API endpoint using
rcloneinstead of native SMB, or set up an Azure VPN Gateway if it needs to be permanent. - Files show up in Explorer but not in the Azure Portal browser: give it a minute — the portal’s file browser view has its own cache and can lag a few seconds behind the actual share contents.
File Share vs Blob Storage vs Managed Disk
It’s worth being clear about when a File Share is actually the right tool, because I see people reach for it by default:
- File Share: use it when multiple machines or users need simultaneous read/write access over SMB or NFS — think shared drives, lift-and-shift of an on-prem file server, or a config folder shared across several VMs.
- Blob Storage: better for a single application storing and retrieving objects (images, backups, logs) via API rather than a mounted drive — cheaper per GB and scales further.
- Managed Disk: use this when only one VM needs the storage and it needs to behave like a local hard drive (e.g. a database’s data files) — a File Share adds network latency that a managed disk doesn’t.
For the test setup in this post, Cool tier File Share was the cheapest correct choice since the files sit there most of the time and get accessed occasionally — if you’re mounting it as an active working directory that gets hit constantly, Hot tier will actually work out cheaper despite the higher per-GB storage cost, because Cool tier charges more per transaction.
Related reading
- Mount it from a VM: create your first Azure VM
- Starting from scratch? Create the Azure Storage Account it lives in