
Azure Basics – Create Azure Storage Account
In order to start working with storage volumes in Microsoft Azure, the first thing needed is having an Azure Storage Account, which is basically a hub where the storage resources will be stored, so, in this post we will create Azure Storage Account.
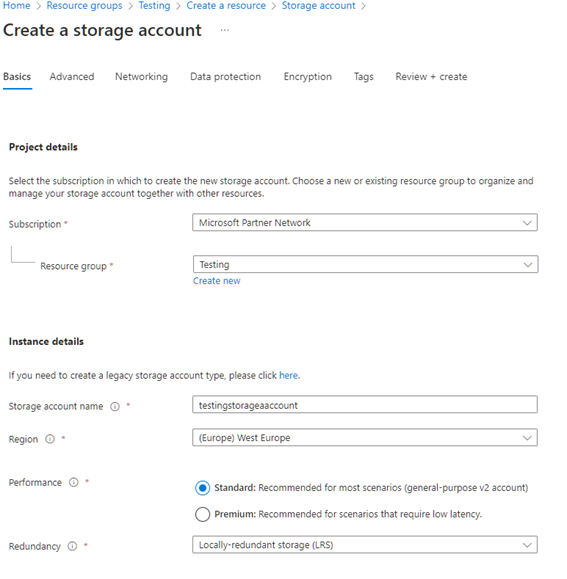
To start the creation of an Azure Storage Account, the only thing to do is going to the Azure menu to create a new resource and select Storage Account, with this, a screen like this will appear on screen, where we will enter the name and the rest of the data needed, like the Resource Group where the Storage Account will be sitting, the Region, the Performance that this will require and the Redundancy, where we can choose between Local Redundancy or Geografic Redundancy.
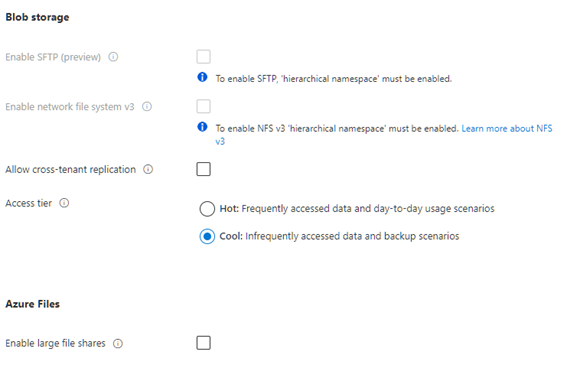
The next settings to set will be the support for protocols liike SFTP or NFS v3, but the most important parameter to set is the Access tier of the Storage Account, where you can choose between Hot or Cool, depending on the frequency of access.
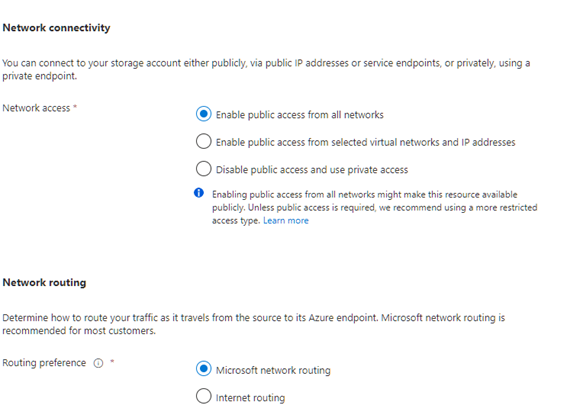
Next, we will set the Networking Connectivity, the options are enable public access, enable private access or disable either public or private access, like the following image.
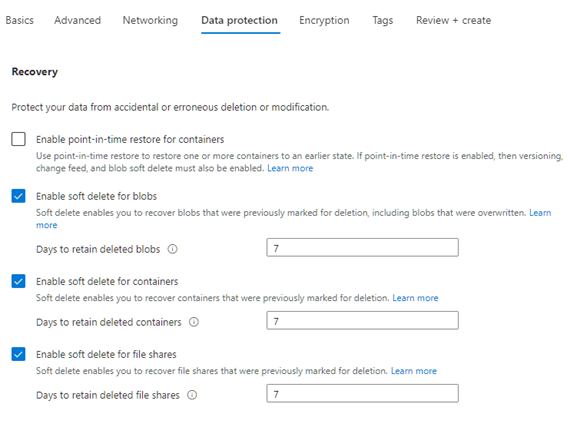
In the Data Protection section I will let the default values, so the soft delete is enabled, like the screenshot.
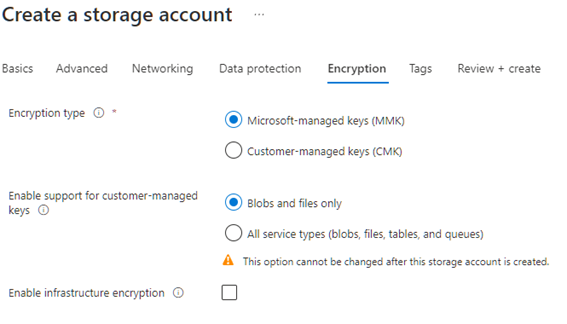
Following to the last section, the last parameters to set are the encryption settings, in my case, the defaults are OK.
Once all of this is done, the only thing to do is hit the Create button and sit for a minute to the creation of the Storage Account. When this is created, we can start creating File Shares, Blobs, disks to attach to our Azure Virtual Machine, etc… but this are things we will talk in a later post…
Redundancy Options, Explained Without the Marketing Language
The redundancy dropdown is where most people either overpay or under-protect their data, because the names alone don’t tell you much:
- LRS (Locally Redundant Storage): three copies within a single datacenter. Cheapest option. Fine for anything you can regenerate or that already has a backup elsewhere — this is what I use for test environments like the one in this series.
- ZRS (Zone Redundant Storage): three copies spread across separate availability zones in the same region. Survives a datacenter-level outage, not just a disk failure. Worth the extra cost for anything production-facing.
- GRS (Geo-Redundant Storage): LRS plus an asynchronous copy in a paired region hundreds of kilometers away. Protects against a full regional outage, but that secondary copy isn’t readable unless Microsoft declares a failover (or you pay extra for RA-GRS to read it directly).
- GZRS: ZRS in the primary region plus geo-replication to a secondary one. The most resilient, and priced accordingly — reserve it for genuinely critical data.
Rule of thumb: LRS for dev/test, ZRS for production data that must survive a datacenter failure, GRS/GZRS only when a regional outage would actually be catastrophic for the business.
Mistakes That Waste the Most Time
- Account name rejected: storage account names must be globally unique across all of Azure, 3–24 characters, lowercase letters and numbers only — no hyphens, no capitals. If your first choice is taken, Azure won’t tell you who has it, it’ll just reject the name.
- Picking Premium performance for a “just testing” account: Premium storage accounts commit you to SSD-backed pricing from minute one, and unlike Standard, Premium file shares and page blobs bill for the provisioned capacity, not actual usage. If you’re experimenting, start on Standard — you can’t downgrade Premium to Standard later without recreating the account, but you can always create a new Premium one when you actually need the throughput.
- Forgetting the region has to match your VM’s region: a Storage Account in a different region from the VM that uses it works, but every read/write crosses regions, which adds latency and (for anything beyond the free egress tier) additional bandwidth cost.
- Leaving public network access wide open by accident: the default “Enabled from all networks” setting is convenient for a five-minute test but not something to leave on anything holding real data — scope it down to your VNet or specific IP ranges once you’re past the testing stage.
Same Thing via Azure CLI
Once you’ve done this in the portal once and understand what each setting does, the CLI is faster for every account after that:
az storage account create
  --name mystorageaccount
  --resource-group myResourceGroup
  --location westeurope
  --sku Standard_LRS
  --kind StorageV2
  --access-tier Cool
StorageV2 is the general-purpose v2 kind and is what you want for almost every new account — the older v1 kind exists mainly for legacy compatibility and doesn’t support tiering or the newer redundancy options. Swap Standard_LRS for Standard_ZRS, Standard_GRS, or Premium_LRS depending on which redundancy tier from the list above fits your case.
Related reading
- Next step: create an Azure File Share on top of it
- Studying for the cert? What AZ-900 actually teaches you