

Azure Basics – Creation of a new Azure SQL DB
Once the creation of an Azure Virtual Machine is just overcome, as explained in the previous post Azure basics – Creating a new virtual machine, learn how to create some more resources on Azure, like. hummm, let me see… how to create an elastic Database, capable of adding more storage or compute power as the needs require it.
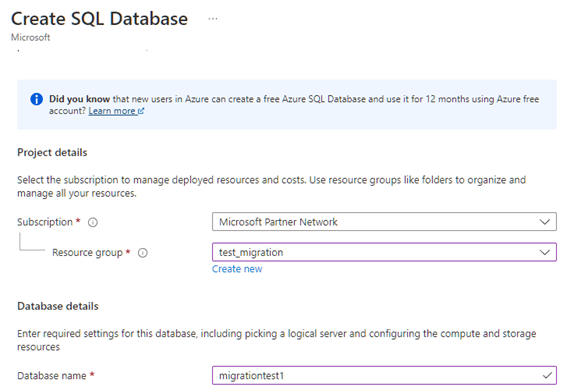
First things first, as always, to create a resource, SQL database in this case, we will set the subscription and database name.
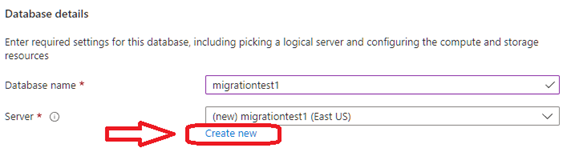
In the server section, we will hit Create new.
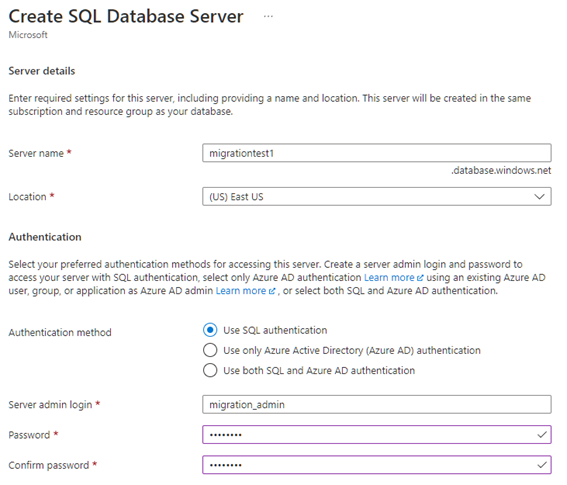
And now, just give it a name, admin user and password and location, like the screenshot.
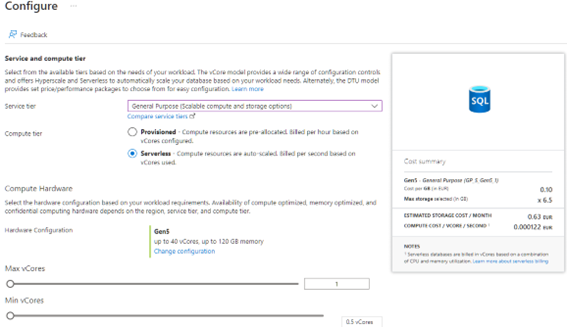
In the Compute + Storage we will click in Configure Database

Now, we will check the compute power and storage we estimate, this can be scaled after, don’t be afraid.

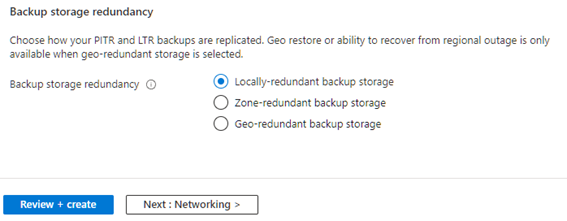
When the redundancy (as we want this) is configured, hit the Next: Networking button.
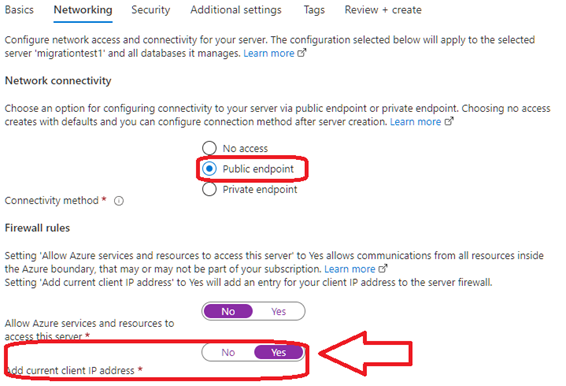
Just landed in the networking section, where we will set the connectivity at Public endpoint level, and will add our IP in the Firewall, so we can connect form outside Azure.
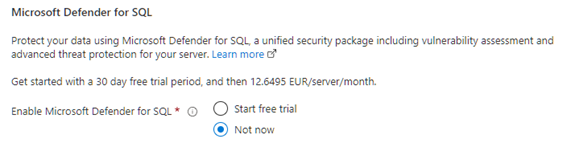
In the security section we just unchecked the Microsoft Defender check.
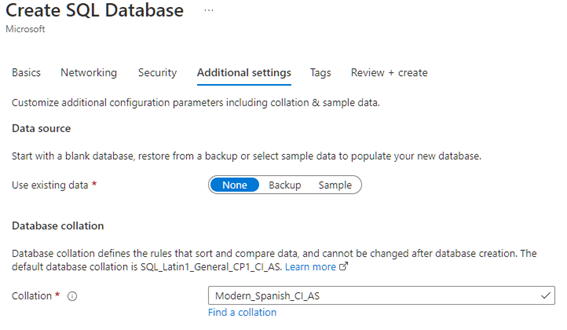
In the Additional settings we will set None at the existing data and set the correct collation.
When all of this is set correctly, we can hit Create to start creating the DB.
¡Connect to the new Azure SQL Database!
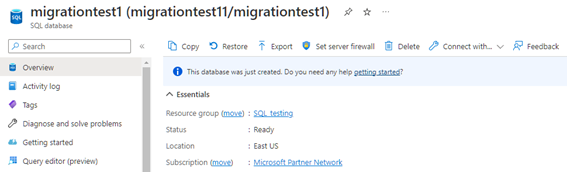
Once created, go to the Dashboard, and should seem just like this.
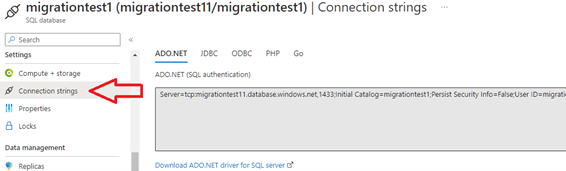
In Connection strings are stored the strings to connect to the BD by different ways, like ADO.NET, JDBC, ODBC, PHP or Go as well as the download for the driver to make the connection.
So now, let’s go playing with the new SQL Database in the cloud! Connect your data from anywhere around the globe!
Don’t forget that Microsoft Learn has more information that you can handle, just follow the link and start learning.
DTU vs vCore: Which Pricing Model to Pick
The “Configure Database” screen defaults to one purchasing model, but it’s worth knowing there are two, because switching later means downtime:
- DTU-based (Basic/Standard/Premium): a bundled unit of compute, memory and I/O. Simpler to reason about for small workloads and often cheaper for light, predictable usage — this is what I used for the test DB in this post.
- vCore-based (General Purpose/Business Critical/Hyperscale): lets you size compute and storage independently, and is the only model that supports Hyperscale (near-instant storage growth to 100TB+) and Azure Hybrid Benefit if you already own SQL Server licenses. Worth the extra complexity once the database is doing real work.
If you’re not sure which to pick for a production workload, start vCore — it’s easier to scale down from than to migrate into later.
Connection Errors and How to Actually Fix Them
- “Cannot open server requested by the login. Client with IP address ‘x.x.x.x’ is not allowed to access the server”: the most common one. Your IP isn’t on the server firewall allow-list — either it changed since you added it (common on home broadband with dynamic IPs) or you added it under the wrong server. Go to the SQL Server resource (not the database) → Networking → add your current IP.
- Connects fine from Azure Cloud Shell but times out locally: check whether your ISP or corporate firewall blocks outbound port 1433, which is what Azure SQL uses. Some networks only allow 443/80 outbound.
- “Login failed for user” despite correct password: double-check you’re using the server admin login format (
username@servername), not just the username — older SQL client tools sometimes require the full form even though the newer ones don’t need it. - Intermittent timeouts under light load: on the Basic DTU tier this is often just resource throttling — 5 DTUs doesn’t leave much headroom. Check the “Resource utilization” chart in the portal before assuming it’s a network issue; scaling to Standard S0 usually resolves it immediately.
Backups Are Already Running — Here’s How to Use Them
Something that isn’t obvious from the creation wizard: Azure SQL Database takes automatic backups from the moment it’s created, with no extra setup. Point-in-time restore lets you recover to any moment within the retention window (7 days by default on Basic tier, up to 35 days on Standard/Premium):
az sql db restore
  --dest-name mydb-restored
  --name mydb
  --resource-group myResourceGroup
  --server myserver
  --time "2026-08-30T10:00:00"
Note this always restores to a new database name — you then swap connection strings or rename databases to cut over, rather than restoring in place. Worth testing this once on a throwaway database before you actually need it in an emergency.
Related reading
- Already have a local database? Migrate it to Azure SQL
- Studying for the cert? What AZ-900 actually teaches you